Lead Capture to CRM Workflow
Automatically capture leads from website forms and add them to your CRM with intelligent duplicate detection
Overview
This beginner-friendly workflow demonstrates how to capture form submissions from your website, check if the contact already exists in your CRM, and send a personalized welcome email to new leads.
What You'll Build:
- Receive form submissions via webhook
- Automatically match to existing contacts (prevent duplicates)
- Tag new leads with "Website Lead"
- Send personalized welcome email
- Log activity in CRM
Real-World Applications:
- Contact form submissions
- Newsletter signups
- Download/resource requests
- Event registrations
- Free trial requests
Workflow Diagram
graph LR
    A[Website Form<br/>TRIGGER] --> B[Match to Client<br/>ACTION]
    B --> C{If Statement<br/>New Contact?}
    C -->|Yes| D[Edit Client<br/>Add Tag]
    C -->|No| E[Workflow Note<br/>Log Return Visit]
    D --> F[Email<br/>Welcome Message]
    E --> G[Email<br/>Thank You]
    F --> H[End]
    G --> H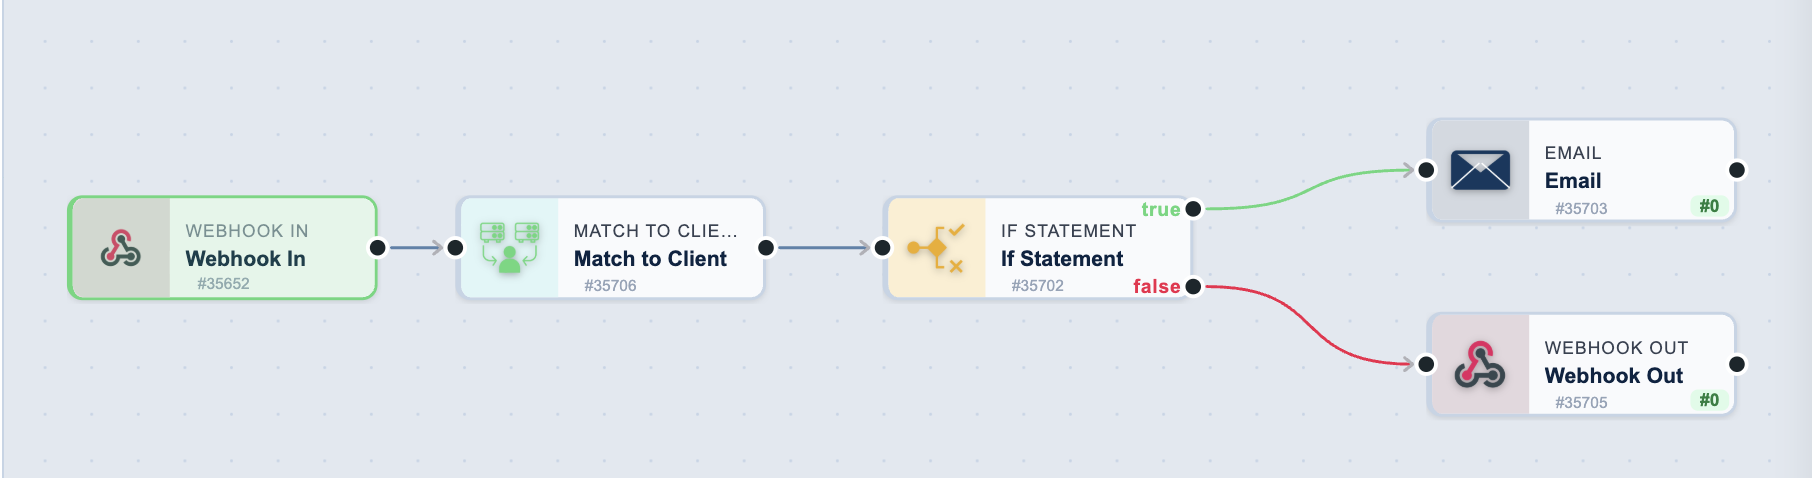
Tasks Used
| Order | Task Type | Purpose |
|---|---|---|
| 1 | Website Form | Capture form submission data |
| 2 | Match to Client | Find existing contact record |
| 3 | If Statement | Check if new contact |
| 4 | Edit Client | Add "Website Lead" tag |
| 5 | Send welcome email | |
| 6 | Workflow Note | Log activity |
Total Setup Time: 15-20 minutes
Skill Level: Beginner
Prerequisites: Embedded website form or external form webhook
Step-by-Step Setup
Step 1: Create Workflow
- Go to Settings → Automation
- Click Add Workflow
- Enter workflow name:
Lead Capture - Website Form - Description:
Capture form leads and send welcome email - Click Create Workflow
Step 2: Add Website Form Trigger
- Click Add Task on canvas
- Search for "Website Form" or filter by Triggers
- Click Website Form card
- Configure:
- Form: Select your website form from dropdown
- Task Name:
Capture Form Submission
Output Variables Available:
{{task_1001_name}}              // Full name from form
{{task_1001_email}}             // Email address
{{task_1001_phone}}             // Phone number
{{task_1001_company}}           // Company name
{{task_1001_message}}           // Message field
{{task_1001_utm_source}}        // UTM source
{{task_1001_utm_campaign}}      // UTM campaign
Step 3: Add Match to Client Task
- Click Add Task below form trigger
- Search for "Match to Client"
- Configure:
- Parent Task:
Capture Form Submission - Match by: Email (recommended)
- Email Field:
{{task_1001_email}} - Name Field:
{{task_1001_name}} - Phone Field:
{{task_1001_phone}} - Company Field:
{{task_1001_company}} - Create if not found: ✅ Yes (checked)
What This Does:
- Searches for existing contact with matching email
- Creates new contact if no match found
- Prevents duplicate records automatically
Output Variables:
{{task_1002_client_id}}         // Contact ID (new or existing)
{{task_1002_is_new_client}}     // true/false
{{task_1002_client_name}}       // Contact name
{{task_1002_client_email}}      // Contact email
Step 4: Add If Statement (Check if New)
- Click Add Task below Match to Client
- Search for "If Statement"
- Configure:
- Parent Task:
Match to Client - Condition Type: Text comparison
- Field 1:
{{task_1002_is_new_client}} - Operator: Equals
- Field 2:
true - Task Name:
Check if New Contact
What This Does:
- Branches workflow based on whether contact is new
- New contacts get welcome email + tag
- Existing contacts get thank you email
Step 5a: Add Tag for New Contacts (TRUE Branch)
- Click Add Task on TRUE branch
- Search for "Edit Client"
- Configure:
- Parent Task:
Check if New Contact(TRUE) - Client ID:
{{task_1002_client_id}} - Action: Add Tags
- Tags:
Website Lead, {{task_1001_utm_source}} - Task Name:
Tag New Lead
What This Does:
- Adds "Website Lead" tag to new contacts
- Optionally adds UTM source as tag for attribution
Step 5b: Log Return Visit (FALSE Branch)
- Click Add Task on FALSE branch
- Search for "Workflow Note"
- Configure:
- Parent Task:
Check if New Contact(FALSE) - Client ID:
{{task_1002_client_id}} - Note Type: Website
- Note:
Submitted form again: {{task_1001_message}} - Task Name:
Log Return Visit
What This Does:
- Records activity for existing contacts
- Tracks repeat form submissions
- Visible in contact timeline
Step 6a: Send Welcome Email (New Contacts)
- Click Add Task after "Tag New Lead"
- Search for "Email"
- Configure:
- Parent Task:
Tag New Lead - To:
{{task_1002_client_email}} - From Name: Your Company
- From Email: hello@yourcompany.com
- Subject:
Welcome {{task_1002_client_name}}! -
Body:
Hi {{task_1002_client_name}},

Thank you for your interest in [Your Company]!

We received your message:
"{{task_1001_message}}"

A member of our team will reach out within 24 hours.

In the meantime, check out these resources:
- [Resource 1]
- [Resource 2]
- [Resource 3]

Best regards,
The [Your Company] Team
Personalization Variables:
{{task_1002_client_name}}- Contact's name{{task_1001_message}}- Their form message{{task_1001_company}}- Their company
Step 6b: Send Thank You Email (Existing Contacts)
- Click Add Task after "Log Return Visit"
- Search for "Email"
- Configure:
- Parent Task:
Log Return Visit - To:
{{task_1002_client_email}} - Subject:
Thanks for reaching out again! -
Body:
Step 7: Test Your Workflow
Test with Form Trigger Record
- Click on Website Form trigger task
- In LEFT panel, click Create Test Record
- Fill in test data:
- Name: Test User
- Email: test@example.com
- Phone: +1234567890
- Message: This is a test submission
- Click Save Test Record
- Click Run Task on form trigger
- Watch workflow execute through all tasks
Verify Each Task
- Match to Client - Check output shows existing client found
- If Statement - Verify TRUE branch taken (new contact)
- Edit Client - Confirm "Website Lead" tag added in CRM
- Email - Check email sent (view in email logs)
Step 8: Enable Workflow
- Once tested successfully, toggle Enable on each task
- Workflow will now run automatically on form submissions
Expected Output
For New Contacts:
- ✅ Contact created in CRM
- ✅ Tagged with "Website Lead"
- ✅ Welcome email sent
- ✅ Form submission logged
For Existing Contacts:
- ✅ Contact matched (no duplicate created)
- ✅ Return visit logged in workflow notes
- ✅ Thank you email sent
- ✅ Form submission logged
Common Issues & Solutions
Issue: Duplicate contacts still being created
Cause: Match to Client not configured correctly
Solution:
- Verify "Match by Email" is selected
- Ensure email variable is correct:
{{task_1001_email}} - Check "Create if not found" is enabled
- Test with known email address
Issue: Welcome email sent to existing contacts
Cause: If Statement logic reversed
Solution:
- Check If Statement compares
{{task_1002_is_new_client}}equalstrue - Verify Welcome Email is on TRUE branch
- Verify Thank You Email is on FALSE branch
Issue: Variables showing as empty {{task_X_field}}
Cause: Parent task not selected or task not run
Solution:
- Verify each task has correct Parent Task selected
- Run tasks in order from trigger down
- Check trigger task output in RIGHT panel
- Ensure previous task completed successfully
Issue: Emails not sending
Cause: Email configuration or SMTP settings
Solution:
- Verify "From Email" is authorized sender
- Check email syntax is valid
- Test with your own email address first
- Open the Email task's OUTPUT panel on the workflow run to see what it reported
Workflow Enhancements
Add SMS Notification
After welcome email, add SMS task:
To: {{task_1002_client_phone}}
Message: Hi {{task_1002_client_name}}! Thanks for reaching out.
We'll be in touch soon. - [Your Company]
Add Lead Scoring
Use Edit Client to set custom field:
Add Slack Notification
Add Webhook Out task to notify sales team:
URL: https://hooks.slack.com/services/YOUR/WEBHOOK/URL
Method: POST
Body:
{
  "text": "🎉 New lead: {{task_1002_client_name}} ({{task_1002_client_email}})"
}
Add Lead Assignment
Use Round Robin task to assign to sales rep:
Related Workflows
- Payment to Invoice - Process payments from forms
- Facebook Lead Nurture - Multi-step email sequences
- Support Ticket Creation - Create support tickets from forms
Related Tasks
- Website Form - Trigger documentation
- Match to Client - Duplicate prevention
- If Statement - Conditional logic
- Edit Client - Tag management
- Email - Email configuration
- Workflow Note - Activity logging
Next Steps
✅ You've built your first workflow!
Try these next:
- Add more form fields (company, job title, etc.)
- Create different email templates for different forms
- Set up lead scoring based on UTM parameters
- Add delay task for follow-up email after 24 hours
- Create assignment rules for different lead sources
Need help? Check Troubleshooting or Best Practices